Switch Windows XP licensing type and/or Service Pack with CD
By admin | July 1, 2009
If you install a new copy of Windows XP with a retail CD and later try to feed it a volume license (VLK) serial number, Windows will not accept it. Fortunately, there is a way to switch the Windows licensing type without having to reinstall completely. This method can also be used to switch the Service Pack of Windows XP with a CD.
Requirements
- A Windows XP CD with your desired licensing type and service pack
- A Windows XP computer
Steps
- Insert the Windows XP CD into the computer.
- Restart the computer, booting from CD.
- Once Setup has loaded, press Enter.
- Accept the license by pressing F8.
- Setup will then search for previous (or current) versions of Windows already present on the computer. Once it finds the current installed Windows, select R for “repair”.
- Setup will copy a batch of files, then reboot. After the reboot it will re-configure your computer, in which it may (or may not) ask you for a new serial number (e.g. retail to volume licensing).
- After a long time reconfiguring, setup will reboot into your newly converted XP install.
If you found this article helpful or useful, please help Compdigitec spread the word. Don’t forget to subscribe to Compdigitec Labs for more useful or interesting articles!
Topics: Windows | 16 Comments »
UXTheme patches
By admin | June 10, 2009
In order to discourage use of non-standard themes for Windows that are not from Microsoft, the Windows uxtheme.dll has been designed to check for a digital signature that had to be signed by Microsoft. This creates a problem because many people may not like all the themes that were created by Microsoft or shipped with Microsoft. Microsoft has even attempted to sue people for making custom themes. To counter this, there is a collection of UxTheme patches available on the Internet to use.
To use it, you need to “unlock” the uxtheme.dll. It is found in %SYSTEMROOT%\system32\uxtheme.dll. After unlocking, you can replace the file with the patched version (with the right OS version as well).
If you found this article helpful or useful, please help Compdigitec spread the word. Don’t forget to subscribe to Compdigitec Labs for more useful and interesting articles!
Topics: Windows | 4 Comments »
Solving “XAMPP: Couldn’t start MySQL!”
By admin | May 30, 2009
XAMPP for Linux is a convenient package for installing the AMPP stack (Apache, MySQL, PHP, Perl) of web server software, but it also has its own share of problems. One such error is the generic and uninformative error of “XAMPP: Couldn’t start MySQL!“. This is confusing because it does not say anything about the error. It is usually caused by permission errors because it is not able to write to a directory. Here is how to fix it:
- Open a terminal.
- Once the terminal has loaded, type “sudo chown -hR root /opt/lampp“. (Note: replace /opt/lampp with the XAMPP install directory).
- (Update from comment #7, untested) Type “sudo chmod -R 777 /opt/lampp“.
- Restart XAMPP with “sudo /opt/lampp/lampp restart“.
- Exit the terminal (right-hand corner X or type exit).
Alternate solution for those who could not get the above working:
- Re-download the LAMPP package from http://www.apachefriends.org/. (wget http://downloads.sourceforge.net/sourceforge/xampp/xampp-linux-1.7.1.tar.gz -O /tmp/xampp-linux-1.7.1.tar.gz)
- Navigate to /opt/lampp/htdocs (or where-ever you store your documents) and back it up to another location. (mkdir /tmp/htdocs followed by cp -r /opt/lampp/htdocs/*/tmp/htdocs/)
- (optional) Also back up the configuration directory and the phpmyadmin configuration (mkdir /tmp/etc followed by cp -r /opt/lampp/etc/*/tmp/etc/ followed by cp /opt/lampp/phpmyadmin/config.inc.php /tmp/)
- Delete the entire LAMPP tree (sudo rm -rf /opt/lampp)
- Re-extract the LAMPP tree from root (tar xvfz /tmp/xampp-linux-1.7.1.tar.gz -C /opt)
- Restore htdocs folder to /opt/lampp (sudo cp -r /tmp/htdocs/* /opt/lampp/htdocs/)
- (optional) Restore configuration folder and phpmyadmin config (sudo cp -r /tmp/etc/* /opt/lampp/etc/ followed by sudo cp /tmp/config.inc.php /opt/lampp/phpmyadmin/config.inc.php)
Topics: Internet, Linux | 69 Comments »
Disable annoying update manager behaviour in Ubuntu 9.04
By admin | May 15, 2009
After the upgrade to Ubuntu 9.04, the update manager will consistently try to pester you with upgrades, even if you select to not check for updates to Ubuntu. This behaviour annoys users because it attempts to force people to upgrade packages when they might be doing something important on the computer and also always comes up when you least expect it. You can revert this behaviour to the previous way of showing a notification in the system tray:
- Open a terminal.
- Enter “gconftool -s –type bool /apps/update-notifier/auto_launch false“.
- Type “exit” to exit the terminal.
Topics: Linux | 3 Comments »
Fixing “There was an error creating a child process for this terminal”
By admin | May 12, 2009
Update (2009-08-27): If you are missing mountdevsubfs.sh.dpkg-dist, you can download it here.
After a recent upgrade to Ubuntu 9.04 on a computer, GNOME Terminal and xterm stopped working suddenly by displaying an error message that read “There was an error creating a child process for this terminal.” This is caused by a bug resulting from the unauthorized changes to mountdevsubfs.sh. To fix it, take the following steps:
- Switch to a terminal that works by pressing Ctrl+Alt+F1 twice. (press Ctrl+Alt+F7 to restore desktop)
- Login to Ubuntu (type in your username followed by your password).
- Enter “sudo mv /etc/init.d/mountdevsubfs.sh /etc/init.d/mountdevsubfs.sh.old“to move the old mountdevsubfs.sh out. (Type in your password, again).
- Enter “sudo cp /etc/init.d/mountdevsubfs.sh.dpkg-dist /etc/init.d/mountdevsubfs.sh” to restore the dpkg backup.
- Shutdown and restart the computer by typing “sudo shutdown now -r“.
- (OR) Press Ctrl+Alt+F7 and shutdown through the GUI.
If you found this article helpful or useful, please help Compdigitec spread the word. Don’t forget to subscribe to Compdigitec Labs for more useful or interesting articles!
Topics: Linux | 14 Comments »
Windows Snipping Tool for Windows XP/2003
By admin | April 27, 2009
Update (2009-07-12): Download links for isxunpack.exe and i6comp.exe added.
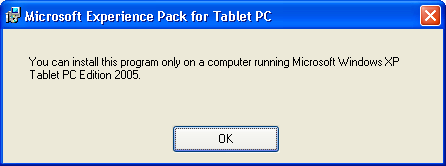
Microsoft’s new Snipping Tool in Windows Vista and higher makes it easier to take screenshots of pictures than having to do Print Screen. There is a backport of this tools called Snipping Tool, but it will only install if it thinks you are running on a Tablet PC. It is part of the Microsoft Experience Pack for Tablet PC package which also features the Royale theme. However, it will only install on a tablet PC and on nothing else. Here is how to extract and run it on a regular PC.
Requirements
- WinRAR
- i6comp.exe
- isxunpack.exe
Instructions
- Download Microsoft Experience Pack for Tablet PCs.
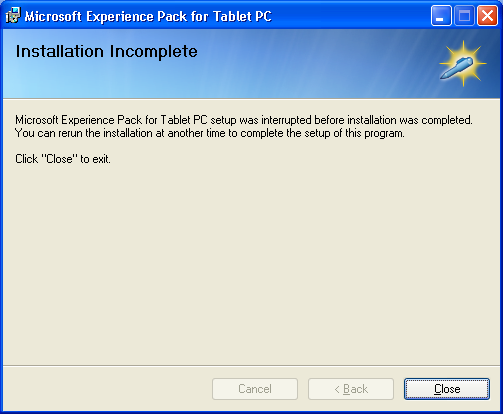
- Attempt to run it and you should receive an error message about how it can only run on tablet PCs.
- Extract the .msi file from the installer by right clicking and selecting “Extract to InstallExperiencePack\“.
- Open a command line and navigate to the newly created directory and type in “msiexec /a Launcher.msi“.
- A window should pop up. Click next and specify a temporary directory.
- After files have been extracted, open the directory in Explorer and navigate to the “Microsoft\Experience Pack\Data” sub-directory.
- Rename SnipTool.dat to SnipTool.exe.
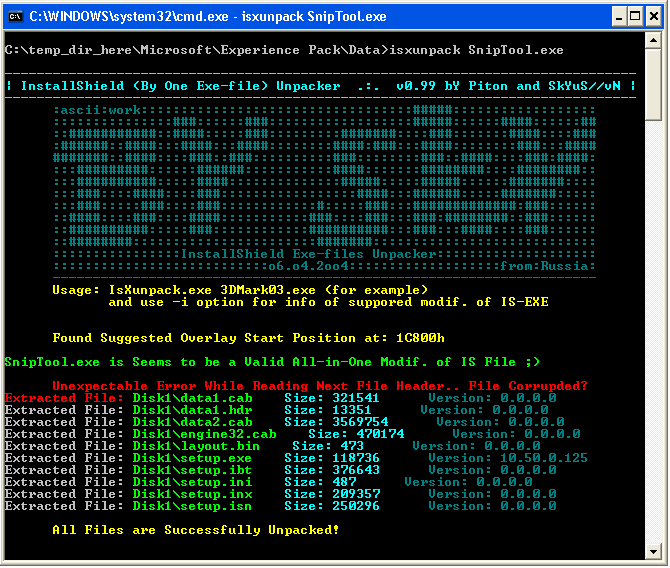
- Open a command line and navigate to the directory and copy isxunpack.exe into it.
- Run “isxunpack SnipTool.exe” in the command line.
- Browse to the new sub-directory “Disk1“.
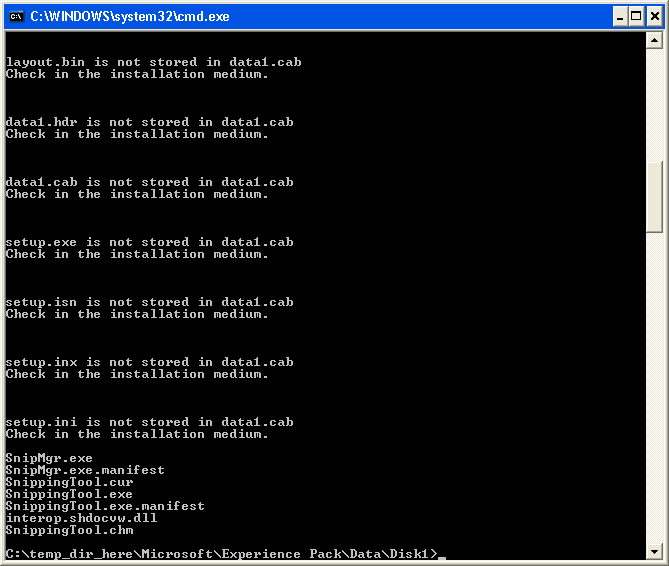
- Open a command line and navigate to the new directory and copy i6comp.exe into it.
- Run “i6comp.exe e data1.cab” and ignore the errors.
- In the Disk1 directory, look at the file SnippingTool.exe and run the file.
Note that the tool will not run on nLited Windows installs without IE/WMP.
Screenshots
If you found this article helpful or useful, please help Compdigitec spread the word. Don’t forget to subscribe to Compdigitec Labs for more useful or interesting articles!
Topics: Windows | 31 Comments »
Recovery of damaged Microsoft Publisher files
By admin | April 25, 2009
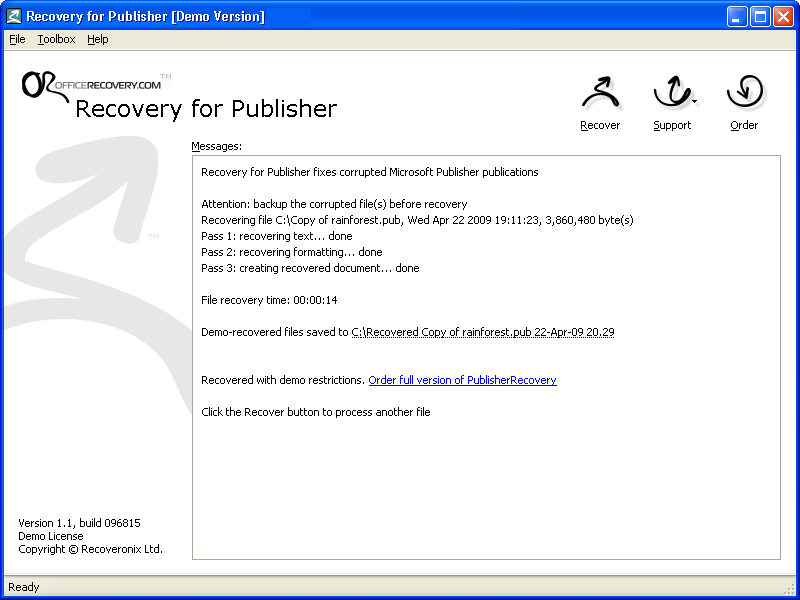
If you have ever had a critical publisher file damaged, you would receive an error from Publisher stating it cannot open the file. If the file was a really important file, then the data contained within it would have been lost forever. But there is a small utility called Recovery for Publisher that will allow you to recover your damaged publisher files.
How to recover the file:
- Download Recovery for Publisher from the official website or a mirror.
- Start the application and select Recover from the menu.
- Select a file from your hard drive to recover.
- Recovery for Publisher will automatically recover your file.
Some limitations of this software are that it does not recover all Office WordArt objects in the file and also it is not free and open source and costs over $100 to purchase. An open source equalivent of this program has not yet been found.
If you found this article helpful or useful, please help Compdigitec spread the word. Don’t forget to subscribe to Compdigitec Labs for more useful or interesting articles!
Topics: Windows | 7 Comments »
Desktop Icon Toy – a Windows icon layout tool
By admin | April 14, 2009
Desktop Icon Toy by iDesk software is a piece of Microsoft Windows software that will allow you to change and tweak the layout of icons on your windows desktop and will also allow you to add tool tips to your icons when you hover over them. It is available in a 14-day trial which you may fully test the product without limitations. Some features of it include being able to arrange your desktop icons into a clock with your local system time. Overall, it is a great tool for tweaking your icon layout on your desktop without being too memory-hungry. It will also allow you to have Vista-style big icons in XP, 2000 or 9x. You can purchase it for the price of $16 or if you were lucky, you could have gotten this software for free from Giveawayoftheday on April 12, 2009.
If you found this article helpful or useful, please help Compdigitec spread the word. Don’t forget to subscribe to Compdigitec Labs for more useful or interesting articles!
Topics: Windows | 5 Comments »
Windows 7 clean install size
By admin | March 17, 2009
If you are ever wondering how much space a clean install of Windows 7 takes, it is 4.81 GB without the pagefile. It is certainly a lot less than the size of the clean install for Windows Vista, which is 12-16 GB. This makes Windows 7 superior to Windows Vista because it is not only smaller but also faster.
Topics: Windows | 14 Comments »
Editing settings for Administrator account in Windows XP
By admin | March 15, 2009
By default, Windows XP’s new user management tool only allows you to edit the Administrator account if there are no other accounts (excluding Guest) on the system that are active. Here is how to manage it with the Windows NT-style of editing users:
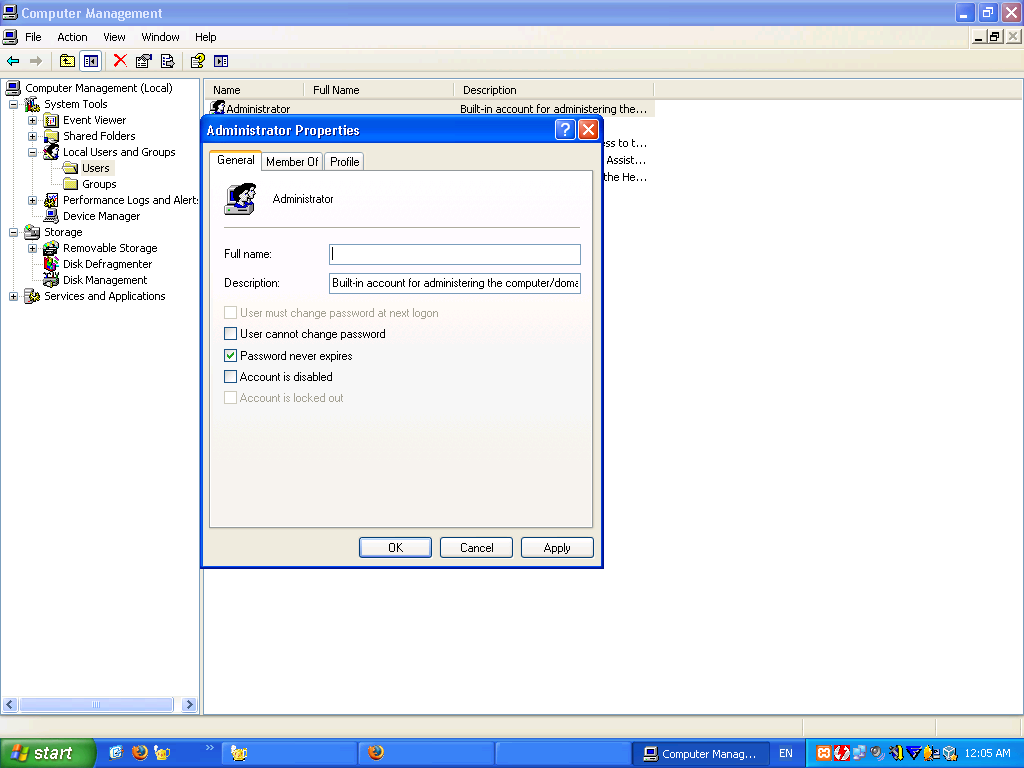
Administrator Account in Windows XP
- Go to Start → Control Panel → Administrative Tools → Computer Management.
- On the left pane, open System Tools >> Local Users and Groups >> Users.
- Double click on the Administrator account and edit its settings.
Topics: Windows | 11 Comments »

